
Introduzione
Jellyfin è una soluzione di streaming multimediale gratuita e open source che ti consente di ospitare il tuo server multimediale. Può essere installato su Linux, Windows e macOS. Puoi gestire i tuoi file multimediali come film, programmi TV, musica e foto e condividerli su più dispositivi utilizzando Jellyfin. Fornisce inoltre applicazioni per Android, Android TV e Amazon Fire TV. Offre diverse funzionalità tra cui, Supporta DLNA, Nessun limite di riproduzione, Recupera automaticamente i metadati da TheTVDB, TheMovieDB e Rotten Tomatoes, Registrazioni automatiche, Supporta l'accelerazione hardware e molti altri.
In questo tutorial spiegheremo come installare e configurare un server multimediale con Jellyfin su Ubuntu 20.04.
Se desideri installare Jellyfin Media Server su un server in remoto continua a leggere, altrimenti salta il primo paragrafo "Connessione al Server" e leggi il successivo.
Connessione al Server
Per accedere al server, è necessario conoscere l'indirizzo IP. Avrai anche bisogno dell'username e della password per l'autenticazione. Per connettersi al server come utente root digitare il seguente comando:
ssh root@IP_DEL_SERVERSuccessivamente sarà necessario inserire la password dell'utente root.
Se non utilizzate l'utente root potete connettervi con un'altro nome utente utilizzando lo stesso comando, quindi modificare root con il vostro nome_utente:
ssh nome_utente@IP_DEL_SERVERSuccessivamente vi verrà chiesto di inserire la password del vostro utente.
La porta standard per connettersi tramite ssh è la 22, se il vostro server utilizza una porta diversa, sarà necessario specificarla utilizzando il parametro -p, quindi digitare il seguente comando:
ssh nome_utente@IP_DEL_SERVER -p PORTAPrerequisiti
- Un server che esegue Ubuntu 20.04.
- Un nome di dominio valido puntato con l'IP del tuo server.
- Una password di root è configurata sul server.
Iniziare
Prima di iniziare, aggiorna i pacchetti di sistema utilizzando il comando seguente:
apt-get update -yUna volta aggiornati tutti i pacchetti, installa le altre dipendenze richieste con il comando seguente:
apt-get install apt-transport-https ca-certificates gnupg2 -yDopo aver installato tutte le dipendenze, puoi procedere al passaggio successivo.
Installare Jellyfin
Per impostazione predefinita, il pacchetto Jellyfin non è disponibile nel repository predefinito di Ubuntu 20.04. Quindi dovrai aggiungere il repository Jellyfin al tuo sistema. Innanzitutto, scarica e aggiungi la chiave GPG con il seguente comando:
wget -O - https://repo.jellyfin.org/jellyfin_team.gpg.key | apt-key add -Una volta aggiunta la chiave GPG, aggiungi il repository Jellyfin all'APT con il seguente comando:
echo "deb [arch=$( dpkg --print-architecture )] https://repo.jellyfin.org/ubuntu focal main" | tee /etc/apt/sources.list.d/jellyfin.listQuindi, aggiorna la cache del repository e installa Jellyfin con il seguente comando:
apt-get update -yapt-get install jellyfin -yDopo aver installato Jellyfin, è possibile verificare lo stato del servizio Jellyfin con il seguente comando:
systemctl status jellyfinDovresti ottenere il seguente output:
? jellyfin.service - Jellyfin Media Server
     Loaded: loaded (/lib/systemd/system/jellyfin.service; enabled; vendor preset: enabled)
    Drop-In: /etc/systemd/system/jellyfin.service.d
             ??jellyfin.service.conf
     Active: active (running) since Sun 2020-12-27 06:15:40 UTC; 58s ago
   Main PID: 8454 (jellyfin)
      Tasks: 16 (limit: 4691)
     Memory: 92.3M
     CGroup: /system.slice/jellyfin.service
             ??8454 /usr/bin/jellyfin --webdir=/usr/share/jellyfin/web --restartpath=/usr/lib/jellyfin/restart.sh --ffmpeg=/usr/lib/jellyfin-f>

Dec 27 06:15:48 ubuntu2004 jellyfin[8454]: [06:15:48] [INF] Registering publisher for urn:schemas-upnp-org:device:MediaServer:1 on 104.245.33.>
Dec 27 06:15:48 ubuntu2004 jellyfin[8454]: [06:15:48] [INF] Executed all pre-startup entry points in 0:00:00.6715621
Dec 27 06:15:48 ubuntu2004 jellyfin[8454]: [06:15:48] [INF] Core startup complete
Dec 27 06:15:48 ubuntu2004 jellyfin[8454]: [06:15:48] [INF] Executed all post-startup entry points in 0:00:00.3885698
Dec 27 06:15:48 ubuntu2004 jellyfin[8454]: [06:15:48] [INF] Startup complete 0:00:08.0109863
Dec 27 06:15:50 ubuntu2004 jellyfin[8454]: [06:15:50] [INF] StartupTrigger fired for task: Update Plugins
Dec 27 06:15:50 ubuntu2004 jellyfin[8454]: [06:15:50] [INF] Queueing task PluginUpdateTask
Dec 27 06:15:50 ubuntu2004 jellyfin[8454]: [06:15:50] [INF] Executing Update Plugins
Dec 27 06:15:50 ubuntu2004 jellyfin[8454]: [06:15:50] [INF] Update Plugins Completed after 0 minute(s) and 0 seconds
Dec 27 06:15:51 ubuntu2004 jellyfin[8454]: [06:15:51] [INF] ExecuteQueuedTasks
Per impostazione predefinita, Jellyfin è in ascolto sulla porta 8096. Puoi verificarlo con il seguente comando:
ss -antpl | grep 8096Dovresti ottenere il seguente output:
LISTEN 0 512 *:8096 *:* users:(("jellyfin",pid=8454,fd=285)) A questo punto, Jellyfin è installato e funzionante. Ora puoi procedere al passaggio successivo.
Configurare Nginx come proxy inverso
Successivamente, si consiglia di configurare Nginx come proxy inverso per Jellyfin. Per fare ciò, prima installa il server web Nginx con il seguente comando:
ss -antpl | grep 8096Una volta installato Nginx, crea un nuovo file di configurazione dell'host virtuale Nginx:
nano /etc/nginx/conf.d/jellyfin.confAggiungi le seguenti righe:
server {
      listen 80;
      server_name jellyfin.yourdomain.com;

      access_log /var/log/nginx/jellyfin.access;
      error_log /var/log/nginx/jellyfin.error;

      set $jellyfin 127.0.0.1;

      location / {
          proxy_pass http://127.0.0.1:8096;
          proxy_set_header Host $host;
          proxy_set_header X-Real-IP $remote_addr;

          proxy_set_header X-Forwarded-For $proxy_add_x_forwarded_for;
          proxy_set_header X-Forwarded-Proto $scheme;
          proxy_set_header X-Forwarded-Protocol $scheme;
          proxy_set_header X-Forwarded-Host $http_host;

          # Disable buffering when the nginx proxy gets very resource heavy upon streaming
          proxy_buffering off;
      }

      # location block for /web - This is purely for aesthetics so /web/#!/ works instead of having to go to /web/index.html/#!/
      location ~ ^/web/$ {
          # Proxy main Jellyfin traffic
          proxy_pass http://$jellyfin:8096/web/index.html/;
          proxy_set_header Host $host;
          proxy_set_header X-Real-IP $remote_addr;
          proxy_set_header X-Forwarded-For $proxy_add_x_forwarded_for;
          proxy_set_header X-Forwarded-Proto $scheme;
          proxy_set_header X-Forwarded-Protocol $scheme;
          proxy_set_header X-Forwarded-Host $http_host;
      }

      location /socket {
          # Proxy Jellyfin Websockets traffic
          proxy_pass http://$127.0.0.1:8096;
          proxy_http_version 1.1;
          proxy_set_header Upgrade $http_upgrade;
          proxy_set_header Connection "upgrade";
          proxy_set_header Host $host;
          proxy_set_header X-Real-IP $remote_addr;
          proxy_set_header X-Forwarded-For $proxy_add_x_forwarded_for;
          proxy_set_header X-Forwarded-Proto $scheme;
          proxy_set_header X-Forwarded-Protocol $scheme;
          proxy_set_header X-Forwarded-Host $http_host;
      }

        # Security / XSS Mitigation Headers
        add_header X-Frame-Options "SAMEORIGIN";
        add_header X-XSS-Protection "1; mode=block";
        add_header X-Content-Type-Options "nosniff";

}
Salva e chiudi il file quando hai finito. Quindi, verifica Nginx per eventuali errori di sintassi con il seguente comando:
nginx -tSe tutto va bene, dovresti ottenere il seguente output:
nginx: the configuration file /etc/nginx/nginx.conf syntax is ok
nginx: configuration file /etc/nginx/nginx.conf test is successful
Quindi, riavvia il servizio Nginx per applicare le modifiche alla configurazione:
systemctl restart nginxPuoi anche verificare lo stato di Nginx con il seguente comando:
systemctl status nginxDovresti vedere il seguente output:
? nginx.service - A high performance web server and a reverse proxy server
     Loaded: loaded (/lib/systemd/system/nginx.service; enabled; vendor preset: enabled)
     Active: active (running) since Sun 2020-12-27 06:18:13 UTC; 6s ago
       Docs: man:nginx(8)
    Process: 9865 ExecStartPre=/usr/sbin/nginx -t -q -g daemon on; master_process on; (code=exited, status=0/SUCCESS)
    Process: 9879 ExecStart=/usr/sbin/nginx -g daemon on; master_process on; (code=exited, status=0/SUCCESS)
   Main PID: 9883 (nginx)
      Tasks: 3 (limit: 4691)
     Memory: 3.6M
     CGroup: /system.slice/nginx.service
             ??9883 nginx: master process /usr/sbin/nginx -g daemon on; master_process on;
             ??9884 nginx: worker process
             ??9885 nginx: worker process

Dec 27 06:18:13 ubuntu2004 systemd[1]: Starting A high performance web server and a reverse proxy server...
Dec 27 06:18:13 ubuntu2004 systemd[1]: Started A high performance web server and a reverse proxy server.
A questo punto, Nginx è installato e configurato per servire Jellyfin. Ora puoi procedere al passaggio successivo.
Accedere all'interfaccia Web di Jellyfin
Ora apri il tuo browser web e accedi all'interfaccia utente web di Jellyfin utilizzando l'URL http://jellyfin.yourdomain.com. Verrai reindirizzato alla seguente schermata:
Seleziona la tua lingua e fai clic sul pulsante Avanti.
Fornire il nome utente e la password dell'amministratore e fare clic sul pulsante Avanti.
Fare clic sul pulsante Avanti.
Seleziona la lingua e il paese dei metadati, quindi fai clic sul pulsante Avanti . Dovresti vedere la seguente schermata:
Seleziona l'opzione desiderata e fai clic sul pulsante Avanti.
Fare clic sul pulsante Fine. Dovresti vedere la pagina di accesso di Jellyfin:
Fornisci il tuo nome utente, password e fai clic sul pulsante Accedi.
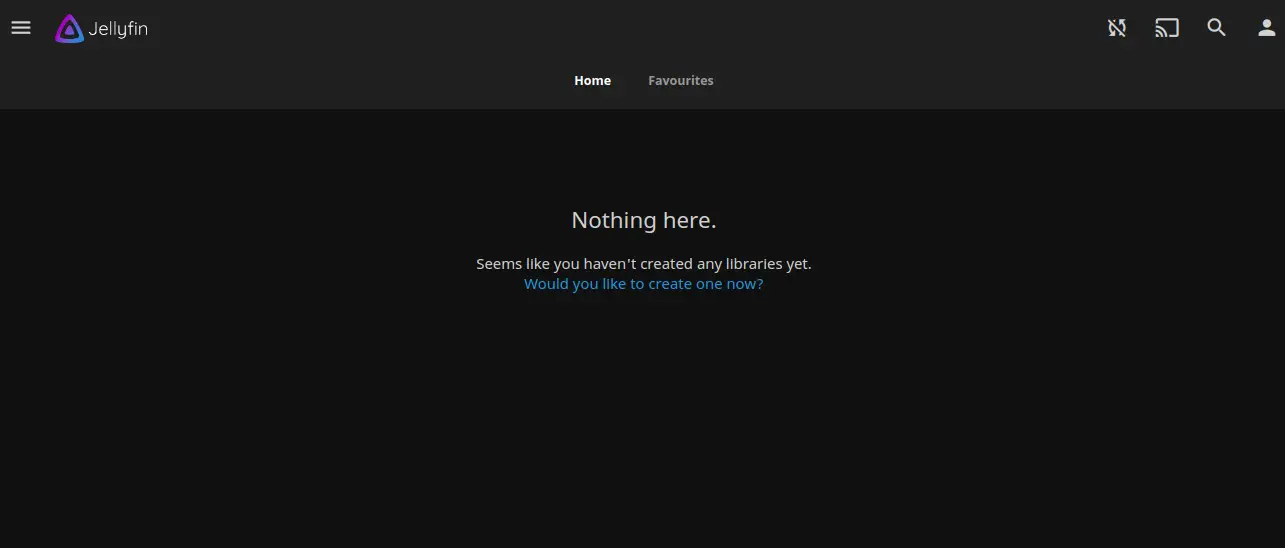
Ora puoi aggiungere i tuoi file multimediali alla libreria e accedervi tramite Internet.
Proteggere Jellyfin con Let's Encrypt
Successivamente, dovrai installare il pacchetto client Certbot per installare la gestione di Let's Encrypt SSL. Innanzitutto, installa Certbot con il seguente comando:
apt-get install python3-certbot-nginx -yAl termine dell'installazione, esegui il seguente comando per installare Let's Encrypt SSL sul tuo sito Web:
certbot --nginx -d jellyfin.yourdomain.comTi verrà chiesto di fornire un indirizzo email valido e di accettare i termini del servizio come mostrato di seguito:
Saving debug log to /var/log/letsencrypt/letsencrypt.log
Plugins selected: Authenticator nginx, Installer nginx
Enter email address (used for urgent renewal and security notices) (Enter 'c' to
cancel): [email protected]

- - - - - - - - - - - - - - - - - - - - - - - - - - - - - - - - - - - - - - - -
Please read the Terms of Service at
https://letsencrypt.org/documents/LE-SA-v1.2-November-15-2017.pdf. You must
agree in order to register with the ACME server at
https://acme-v02.api.letsencrypt.org/directory
- - - - - - - - - - - - - - - - - - - - - - - - - - - - - - - - - - - - - - - -
(A)gree/(C)ancel: A

- - - - - - - - - - - - - - - - - - - - - - - - - - - - - - - - - - - - - - - -
Would you be willing to share your email address with the Electronic Frontier
Foundation, a founding partner of the Let's Encrypt project and the non-profit
organization that develops Certbot? We'd like to send you email about our work
encrypting the web, EFF news, campaigns, and ways to support digital freedom.
- - - - - - - - - - - - - - - - - - - - - - - - - - - - - - - - - - - - - - - -
(Y)es/(N)o: Y
Obtaining a new certificate
Performing the following challenges:
http-01 challenge for jellyfin.yourdomain.com
Waiting for verification...
Cleaning up challenges
Deploying Certificate to VirtualHost /etc/nginx/sites-enabled/jellyfin.conf
Quindi, scegli se reindirizzare o meno il traffico HTTP su HTTPS come mostrato di seguito:
- - - - - - - - - - - - - - - - - - - - - - - - - - - - - - - - - - - - - - - -
1: No redirect - Make no further changes to the webserver configuration.
2: Redirect - Make all requests redirect to secure HTTPS access. Choose this for
new sites, or if you're confident your site works on HTTPS. You can undo this
change by editing your web server's configuration.
- - - - - - - - - - - - - - - - - - - - - - - - - - - - - - - - - - - - - - - -
Select the appropriate number [1-2] then [enter] (press 'c' to cancel): 2
Digita 2 e premi Invio per completare l'installazione. Dovresti vedere il seguente output:
- - - - - - - - - - - - - - - - - - - - - - - - - - - - - - - - - - - - - - - -
1: No redirect - Make no further changes to the webserver configuration.
2: Redirect - Make all requests redirect to secure HTTPS access. Choose this for
new sites, or if you're confident your site works on HTTPS. You can undo this
change by editing your web server's configuration.
- - - - - - - - - - - - - - - - - - - - - - - - - - - - - - - - - - - - - - - -
Select the appropriate number [1-2] then [enter] (press 'c' to cancel): 2
Ora, il tuo sito web è protetto con Let's Encrypt SSL. Puoi accedervi in modo sicuro utilizzando l'URL https://jellyfin.yourdomain.com.
Conclusione
Congratulazioni! hai installato e configurato correttamente Jellyfin con Nginx e Let's Encrypt SSL sul server Ubuntu 20.04. Ora puoi eseguire lo streaming dei tuoi file multimediali e accedervi dal browser Web o utilizzando l'applicazione Jellyfin. Sentiti libero di chiedermi se hai domande.